Doing Some Magick with Photos
If you’ve checked out any of the (many) photos I’ve posted, you might have noticed that I watermark my photos. It’s subtle, but in the bottom right hand corner of every photo it says “www.TechyDad.com”.
[thumb id=”1154″]
Why do I do this? Well, as much as I’d like to assume that people are good, there are a lot of unscrupulous people out there that will grab photos off the Internet for their own use. By watermarking the photo, I’m decreasing its value to these people. (Yes, the watermark could be removed, but it’d take time and effort to do so. The photo thieves are more likely to just head elsewhere to grab some photos.)
In addition to the watermarking, I also rotate some photos (depending on which way they were taken) and resize them for the web. Unfortunately, when I have a lot of photos to process, this can be a time-consuming pain. Initially, my process looked like this:
- Load one photo in Irfanview
- Open up Irfanview’s Thumbnail mode
- Select all images to process
- Use Irfanview’s lossless-JPEG rotate function to auto-rotate all photos
- Open up Irfanview’s Batch Conversion mode
- Select all photos to process and conversion settings (e.g. new height/width)
- Wait until Batch Conversion is done.
- Open up Picture Shark.
- Select All Photos
- Select Watermark
- Wait until watermark is applied to all photos
- Post photos
You can see how this would make photo posting a pain, but each step was necessary. I couldn’t post sideways photos and couldn’t post full-res pictures either. There’s the download time issue as well as the aforementioned picture thieves.
That’s when I remembered about ImageMagick. ImageMagick is a freeware photo manipulation program that is often used on servers to, well, manipulate images. My server, for example, uses it to make thumbnails out of the photos I upload. The only problem is that ImageMagick doesn’t have an graphical interface. It is run by a series of command line statements. This is perfectly fine for a script running on a server, but not as good for a human user.
Since all I wanted to do was run the same commands over and over, and since I know how to program, I wrote a Photo Processor script. It would let me specify the directory that the photos were in, whether I wanted them resized/rotated/watermarked and even allowed me to select which watermark. This way, B could use the same script for TheAngelForever.com. My new photo processing process was:
- Run Script
- Copy/Paste name of directory with photos
- Answer dialogs for resizing/rotating/watermarking photos.
- Wait until script finishes
- Post photos
Much easier, right?
When Monkey was born to Tarzan and Jane over at HisBoysCanSwim, I noticed that their photos of Monkey merely had some text at the bottom of them. This would be easily stripped out by a picture thief so I offered my Photo Processor script. And while I was working on it, I figured I’d post a version for everyone else out there.
The first thing you’ll need to do is install a copy of ImageMagick on your PC. In the configuration screen during setup (the one with all of the checkboxes), make sure that you check the box for “Install ImageMagickObject OLE Control for VBScript, Visual Basic, and WSH.” (See image below.)
[thumb id=”1167″]
Once that is done, download my Photo Processor script. When you run the script, first you’ll need to enter the directory of the photos to be processed (e.g. C:\Photos\My Trip To The Beach\). Don’t worry if they’re your originals, the altered versions will be saved in newly created subdirectories. After you enter the directory, simply answer a few Yes/No questions to set whether the photos are rotated and/or resized and sit back and wait for the script to do its job. To add a watermark, put a PNG image in the same directory as the script and name it “Watermark.png.”
If you have any questions about this script, feel free to post them in the comments below.
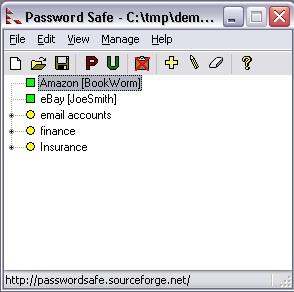 Security is important in today’s online world. A big part of that security is what password you use for the various websites you frequent. It is not uncommon for a person to have dozens of different sites, each with their own username and password. But how to you manage them all? Setting all of your passwords to be the same (e.g. "12345") isn’t safe. (I have the same combination on my luggage!) After all, if someone guesses *one* of your passwords, *all* of your accounts will be compromised. Writing them on paper and sticking it to your monitor isn’t very safe either. Anyone passing by your office/cubicle could see the list and gain access to your accounts. So what should the security conscious web surfer do? Why, put them in a safe of course! No, not a fire-proof safe (though that might be a good hard-copy backup method), but inside an application called (appropriately enough)