Backing Up With BackBlaze

computer-on-fireDisclaimer: BackBlaze gave me a year of free backups for this review.  However, all opinions below are my own.

Backing up is probably the most important step anybody can take with their computers. It’s also likely the least performed step anybody does.

Over the years, my backup routine has changed. I used to backup everything to CDs, then to DVDs when I had too much data for a group of CDs. Eventually, I had too much for DVDs and I moved to external hard drives.  I copied my important files to an external hard drive and copied that to a backup drive (in case the first one failed).

There were just two problems with my backup routine. First of all, it wasn’t automatic. I had to remember to connect the drives and run the backups for each of our computers. Frequently, I’d forget for months on end leaving important data vulnerable. Secondly, while I would theoretically take the second drive to an off-site location (i.e. somewhere other than my house), practically I’d never get around to it. This meant that one burglar or house fire could mean the loss off everything.

I’ll admit, for the longest time I scoffed at cloud backup services. Why would you pay so much for a tiny amount of backup space? For the amount I would need to pay to backup all of my important data (photos, videos, documents, etc.), I could get a new hard drive every year.  Recently, though, I started to realize how vulnerable my backups were. External hard drives were good for a local backup but without the off-site component, we could lose everything in a matter of minutes.

I researched online backup services and many of them suffered from the same flaw: I had over 1TB to back up and they were all offering plans starting much smaller and quickly riding in price. It looked like my scoffing days might continue and my data might continue to not be as safe as to could be.

Enter BackBlaze.

For only $5 a month, BackBlaze gives you unlimited space to back up your files. Unlimited means that you don’t have to worry about extra files pushing you over a limit and costing you extra.  If you have 3TB of files to backup, it will cost you the same as if you have 100GB.

When you sign up for BackBlaze, you download the BackBlaze Control Center.  This application will let you decide which files are backed up and which are skipped.  It can also manage how fast the backup runs, since you might not want to flood your Internet connection with backups and have nothing left to stream Netflix.  You can also get an estimate on how long your backup will take.

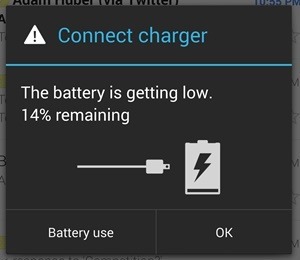
At this point is where I hit my first roadblock.  You see, where I live my available high speed Internet isn’t that fast.  Right now, we get 15Mbps down and 1Mbps up.  I had about 880GB to download.  Even if I flooded my entire 1Mbps with the backups and ran them 24/7, it would take 82 days to complete my initial backup.  At a more reasonable half-of-my-available bandwidth, it would take me 163 days.  If you have a faster Internet connection or less to download, you will complete your backup much quicker.  After that, subsequent backups will run quickly since BackBlaze won’t need to upload ALL of the files that you want to backup – just the new and changed ones.

So what happens if your files are lost?  After all, a backup service without a decent recovery option isn’t worth anything.  To this end, BackBlaze gives multiple options.  First of all, BackBlaze’s software can download your data just like it uploaded it.  Of course, while this option might not cost extra, it could involve extra time depending on your Internet speeds and how much data you are backing up.  In my case, if I used my entire bandwidth every hour of every day, I could get everything back in five and a half days.  At half of my bandwidth, it would take about eleven days.

The second option involves BackBlaze sending you a flash drive containing up to 128GB of data.  This costs $99.  BackBlaze can also send you a 4TB USB hard drive with your data for $189.  The drives are yours to keep or you can return them within 30 days and get refunded the entire cost.  Yes, this does mean that the flash drive and USB hard drive options would wind up being free after the refund goes through.

So would I recommend BackBlaze?

I have two main reservations about the service – one that is in BackBlaze’s control and one that is completely out of their control.  Their software operates on a "backup everything except for exceptions that you list" basis.  This means that, by default, it is trying to back up way too many files.  Sure, they exclude your Windows system folder by default, but still your hard drive is filled with files that you don’t really care about.  It would be better if their software allowed you to choose whether you want to backup everything except for exceptions or only back up folders of your choosing.

The factor that BackBlaze can’t change is ISP upload speeds.  As mentioned earlier, this can turn any online backup service from useful to "too slow to do any good."  After backup up constantly for a few weeks, BackBlaze is still estimating another 120 or so days until my initial backup is done.  I understand that there’s nothing that BackBlaze can do to fix this on the ISP end, but it would be nice if that USB hard drive option worked the other way as well.  BackBlaze could send a hard drive (with a refundable $189 deposit to make sure people didn’t just keep the drives), have you copy your files to the drive, and then mail it back.  Once the drive arrived back at BackBlaze, they could upload the data much quicker and issue a refund for the drive.  This could turn six month long initial backup sessions into one week long initial backups.

Still, even with these limitations, I would still recommend BackBlaze.  The service seems very fast and stable and the price is definitely right.  For the same price as a year of unlimited space at BackBlaze ($60), I would need to pay $120 for 1TB on Google Drive or Dropbox or $84 for 1TB on Microsoft OneDrive.  All three of these require me to pay more for less space.

No matter what you do – be it cloud backup, saving to external hard drives, or burning to disc – backups are a vital part of keeping your digital data safe.  Make sure that you come up with a plan that protects your files from as many different threats as possible. 

NOTE: The image above is a combination of "Cartoon Computer and Desktop" by DTRave and "Fire" by matheod.  Both are available from OpenClipArt.org.

Making Mario Video Games

SuperMarioMakerFrom a young age, I’ve wanted to design video games. I would take sheet after sheet of paper and fill them with drawings of levels, enemies, descriptions of power ups, and more.  I didn’t know how to actually code the games. In addition, I’d often be building on established franchises.  I didn’t think Nintendo would want me coding an unauthorized Mario game.

Except, now they’ve given me the ability to do just that.  Enter Super Mario Maker.

Super Mario Maker lets you design your own Mario levels. The levels can be over-ground, underground, fortress, etc. They can be in the style of many different Mario games from the original 8 bit Super Mario Bros. to New Super Mario Bros. U.

SuperMarioMaker_DifferentStyles

Placing level elements or changing level designs is simple using the WiiU gamepad’s point and click interface.  Want to place a pipe?  Just drag it into the right spot.  Want to move a Koopa?  Just click and drag it around.  Want to make a platform wider?  Just click on the end and pull it.  In addition, some elements respond to shaking.  Shake a green Koopa (which walks in a straight line) and it turns red (and turns around when it reaches a ledge).  Shake a moving platform and it becomes a dropping platform.  Shake Bowser and he becomes Bowser Junior.  Enemies can be modified with super mushrooms (which makes the enemy bigger) and wings (which makes the enemy fly).  Finally, sound effects can be placed to be triggered at certain events.

SuperMarioMaker_Bowser

If all of this sounds overwhelming, don’t worry.  Super Mario Maker starts you off with a small subset of its options.  Over time, as you play, more and more options are revealed.  By the time the full array of possibilities is at your disposal, you’ll be placing level elements like a pro.

SuperMarioMaker_AllOptions

If Super Mario Maker ended here, it would be a pretty great game, but Nintendo went a step beyond.  Once levels are added, you can share them with other Super Mario Maker users worldwide.  Before a level can be shared, you’ll need to play through it.  This ensures that no impossible levels get uploaded.  The levels might be insanely hard, but they will be playable.  You can even share levels by posting course IDs (e.g. 2D00-000-0082-EBA6 – and yes, that’s one of mine and last I checked nobody has beaten it).  You can play selected levels in the 10 Mario or 100 Mario challenges.  You can even use Amibos to power-up the original Super Mario Brothers’ Mario into various characters via "mystery mushrooms".  (Admit it, you’ve always wanted to play Super Mario Bros. as Link from Legend of Zelda.)  Shared levels can be downloaded and edited (but not re-uploaded so don’t worry about someone taking your masterpiece, adding a power-up or two and trying to pass it off as their own).

Since getting the game, my boys have become hooked on making their own video games.  They’ll spend hour after hour piecing together components to make tricky or weird levels.  Sometimes they’ll be easy.  Sometimes they’ll be hard.  One time, JSL made a tough level but didn’t foresee my being able to move Mario into a position at the top of the screen where I was able to avoid almost all of the enemies.  He learned a lesson that day about level design: Always test all possibilities because your users *will* exploit any opening you give them.  (This lesson also applies to programming in general.)

This is definitely a game that my boys and I will be playing for quite awhile.  I’ve already made half a dozen levels (not all uploaded) and I feel like I’ve only scratched the surface of what is possible.  Super Mario Maker is great for any kid of any age who has always wanted to designing video games.

DISCLAIMER: We purchased Super Mario Maker ourselves and weren’t compensated in any way for this review.

Mobile Scanning with A Transforming ScanSnap

Since the advent of scanners, people have been taking paper documents and converting them to digital files.  These files have many advantages over paper.  They take up less space, are easier to search through, can be quickly sent to friends and family, and allow for simple backing up.  The only downside of scanners is that they take up a lot of room, require a computer to be hooked up to them, and can require a lid to be lifted and lowered every time the paper to be scanned needs changing.  (The latter of which can make multiple scan

Enter the ScanSnap iX500.  Where other scanners offer a flatbed approach which takes up a lot of space, the iX500 starts off as a relatively small shell.  This compact shape means that it takes up much less space than a conventional scanner.

scansnap-folded-up

When you need to use the scanner, however, the scanner’s shell unfolds until the full scanner is revealed.

scansnap-unfolding

scansnap-ready-to-scan

When I showed this to my boys, they exclaimed that it’s a transformer and it sure is.

Another annoyance about some scanners is that you need to hook your computer up to them with a cord.  Sure, USB cords are handy and pretty standardized, but they are still cords.  The iX500 takes a wireless approach.  After an initial corded setup, during which the iX500 obtains your network’s wireless credentials, the iX500 can be accessed from the wireless network without any cord connecting the scanner and the computer.  In fact, you can use an iOS or Android app to wirelessly scan to your mobile phone or tablet.

scansnap-mobile-app

You can even edit the resulting PDFs to delete pages or rotate pages (for example, if you accidentally put the paper in upside down).  As with anything on a mobile device, the resulting file can easily be shared with some other app or service.  You can quickly attach the PDF to an e-mail, upload them to a cloud server, or just open them for reading.  The generated PDFs are nice quality also.  Here’s a recipe that I scanned in for Bon Bon Cookies.

Finally, the scanner’s feeder setup means that you can load in a small stack of papers and have the scanner pull them through one at a time until all of them are scanned.  This winds up being much simpler and quicker than replacing papers on a flatbed scanner.

As I mentioned before, my boys were amazed when they saw the scanner transform.  Once they saw the little blue "Scan" icon on my phone, though, they were itching to scan something.  They grabbed artwork that they had made, award certificates that they earned, and more.  One by one, they fed them into the scanner and presses the scan button on my phone.  One by one, the papers came out and the PDFs appeared on my phone.  Eventually, I had to stop them due to a combination of running out of papers to scan and a bedtime that had passed.  I’ve shied away from scanning in the past due to the time it took to boot my computer, hook up the scanner, and hope it all worked.  With the ScanSnap, however, all I need to do is flip open the shell, place in the paper, and use my mobile device to scan in the document.

Quick.  Easy.  And doesn’t take up much room.  The ScanSnap definitely is a scanner that will be getting plenty of use.

Rapid Charging With The Droid Turbo

DISCLAIMER: My wife received a Droid Turbo due to being a member of the Verizon Life Style Bloggers.  Since I was in need of a new smartphone, she gave it to me.  The opinions expressed below are my own.

When you’re out and about, the last thing you want to see on your smartphone is:

droid_turbo_battery

Even if you brought your cable, you might not have much time to recharge your phone.  You might gain a few minutes of use but you can wind up fighting a losing battle as your charging times don’t give you enough battery life to make it to the next charge.  When my wife received the Droid Turbo to review – and gave it to me – I wanted to put both its long battery life and rapid charger to the test.

One day, while out, I decided to put the battery through its paces.  I took photos, played battery-draining games, and used the phone as much as possible.  The end result was that my phone went from 100% to 14% in 12 hours.  If this seems like a short time period, note that this wasn’t "typical usage."  I was intentionally trying to use up the battery’s charge.  My old smartphone would, if I was lucky, probably have lasted half of this time with this level of usage.

Once the indicator reached 14% and the warning was popped up, it was charger time.  I plugged in the rapid charger and kept an eye on the percentages.  A half hour into the charge, the battery had gone from 14% to 46%.  This was a whopping 32% in only 30 minutes.  Basically, this half hour of charging gained me almost 4.5 hours of extreme usage.  Were I attempting to conserve battery life (instead of trying to drain the battery as quickly as possible), a half hour charge using the rapid charger could mean having enough juice to last the rest of the day.

Just over an hour in (65 minutes) and the percentage had reached 79%.  At the 81 minute mark, the battery was at 93%.  Finally, 143 minutes (2 hours and 23 minutes) after I plugged my phone in, the charge reached 100%.

Needless to say, I’m impressed with the results.  The Droid Turbo’s rapid charger definitely lived up to its name.  If you are out and about and your Droid Turbo is running on fumes, a short recharge break can give you enough battery charge to last you a good, long time.

Bluetooth On The Go With The Kinivo BTC450

BTC450If I want to talk on the phone while driving, I’ve got to carry a Bluetooth headset along with me and remember to keep it charged.  If I want to listen to music from my phone in the car, I need to plug the phone into the speaker with a wire and control the music with the phone itself.  Neither situation is optimal.  Enter the Kinivo BTC450 Bluetooth Hands-Free Car Kit.

The BTC450 consists of three components.  The first is a power plug that goes in your car’s cigarette lighter.  This provides power to the entire unit as well as giving you a USB port to charge your device.  The second part is a plug that goes into your stereo’s auxiliary input.  The third, and perhaps most important, component is a small button.

Button

This button might be small, but it is quite powerful.  It connects to your smartphone via Bluetooth and routes audio from your phone to your car’s speaker system (via the aforementioned auxiliary input plug).  It also acts as a microphone so the people you are talking to on the phone can hear you.  Pressing the button can both begin or end a phone call.  Finally, two small buttons on top allow you to skip ahead or go back while listening to music.  No longer do you have to pick up your cell phone while driving (a very unsafe thing to do), just press the button.

Of course, all of this wouldn’t be worth anything if the audio quality wasn’t good.  In my testing, the audio coming from the speakers (routed from the BTC450) was very good.  The people I called initially reported that I sounded muffled, but I repositioned the button/microphone and they said that I was coming in much clearer.  The button comes with adhesive to affix it on your dashboard for easy access.  I positioned it on a spot on my dashboard without the adhesive, but if you do stick it on, I’d recommend trying it out before using the adhesive.

Overall, this was a very nice way of enabling Bluetooth access in my car.  Considering that the BTC450 only costs $39.99 (affiliate link), it is quite an inexpensive method of adding Bluetooth to your car as well.  This is definitely a device that will get plenty of use every time I go for a drive.

DISCLAIMER: I was sent a Kinivo BTC450 Bluetooth Hands-Free Car Kit to review.  The opinions expressed above are my own.  No compensation (other than the product) was provided.

1 2 3 16